
Given the frequency of my need to provide screen shots of steps involved in these pragmatic computing tips, I ran into this obstacle pretty quick.
Every time I needed to snip (take a screen shot of) a drop down menu, the menu I needed to snip would disappear as soon as I opened the Snipping Tool. I didn’t want to go back to the legacy screen shot method (Alt+Print Screen). Those screen shots captured entire windows – much more than I needed – and then I would need to crop the images.
I knew there had to be a way to use this new, cool, more efficient tool, and there was. (I actually needed to use this method to get the screen shots I needed for this post.) Here’s how it works:
1. Display the menu you want to snip/screen shot. In this particular case, I wanted to snip something on the Start Menu, so I clicked the Start button to display the menu.
2. Open the Snipping Tool. The menu you just displayed will disappear. In my case, the Start Menu disappeared. (If this is the first time you’ve used the Snipping Tool, you’ll need to search for it – instructions immediately following below.)
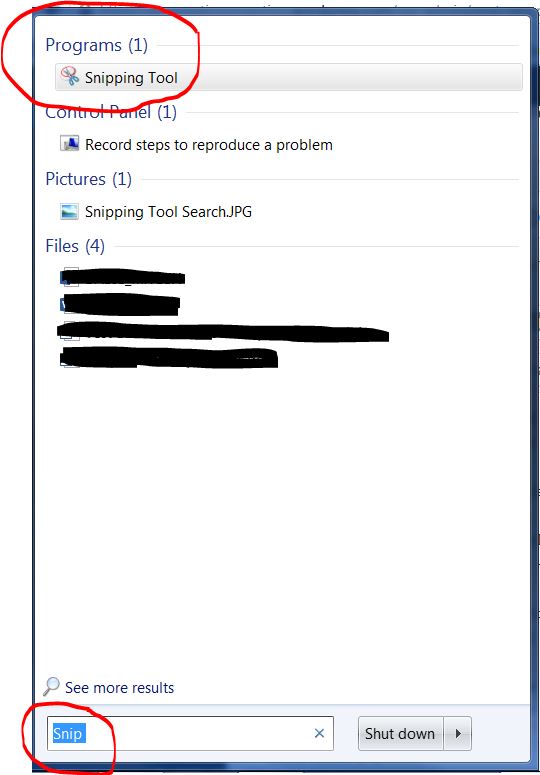
To search for the Snipping Tool, click the round Start button at the bottom left corner of your monitor and begin typing “Snipping Tool” in the search box:

As soon as you begin typing, Windows 7 will find it and list it at the top of the menu:
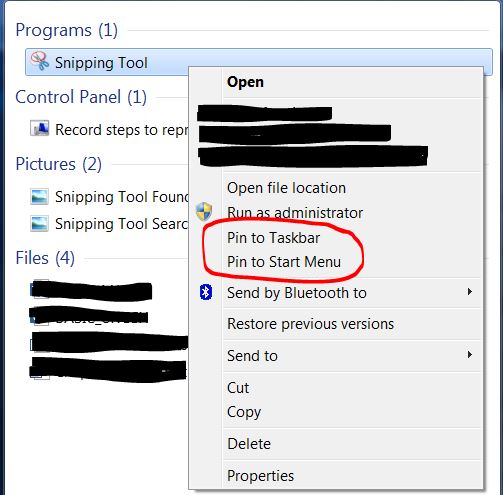
Do yourself a favor. Right click the Snipping Tool and “Pin” the Snipping Tool to Your Taskbar and/or your Start Menu so you never have to search for it again:

Now the Snipping Tool is easily available any time you needed it.
Back to Step 2.
2. Open the Snipping Tool. Again, a small window will open, the menu you’ve displayed and want to clip will disappear and the screen will fade in color a little bit. That’s normal.
3. Press Esc on the Keyboard. The small Snipping Tool window will stay open and the vibrancy of the screen colors will come back.
4. Re-open the menu that you need to snip.
5. Press Ctrl+PrtScn. (Staayyyy with me…Don’t quit just because you can’t find the PrtScn button. There’s one on every keyboard, just not always in the same location.)
The screen will fade in color again to let you know the Snipping Tool is active.
6. Click and drag the area around the area of the screen you need to snip.
7. When you let go of the mouse button after the click and drag, your screen shot will be displayed in the Snipping Tool window and you can save, copy or email it.
(To learn more about the Snipping Tool, click HERE)
