Have you ever been in a Zoom meeting while someone is sharing their screen and grey boxes began showing up at random, covering parts of what’s being shared?
I have. And it’s annoying. I actually see it from both sides when I share my screen because I often run multiple computers during Zoom meetings: I run the meeting on my two monitor desktop, I share PowerPoint slideshows from my laptop and I sometimes join on my tablet as well, so I see the grey boxes on my desktop and tablet AND I see the actual messages behind the boxes on my laptop.
I haven’t wanted to derail an entire session and make people wait while I searched for the setting, and truth be told, I use GoToMeeting more often, so I kept forgetting about Zoom’s grey box problem after the sessions were over. Today, I finally took the time to troubleshoot. I had to try a number of search strings before I finally tracked down the issue because I didn’t know exactly what setting I was looking for. Search strings referencing “Zoom notifications” didn’t lead me to the answer. These messages weren’t really notifications. Of the multiple messages I kept seeing on my laptop, the one I saw the most actually read:
“You are sharing your screen.”
Thank you Zoom, for letting me know that. 🙄
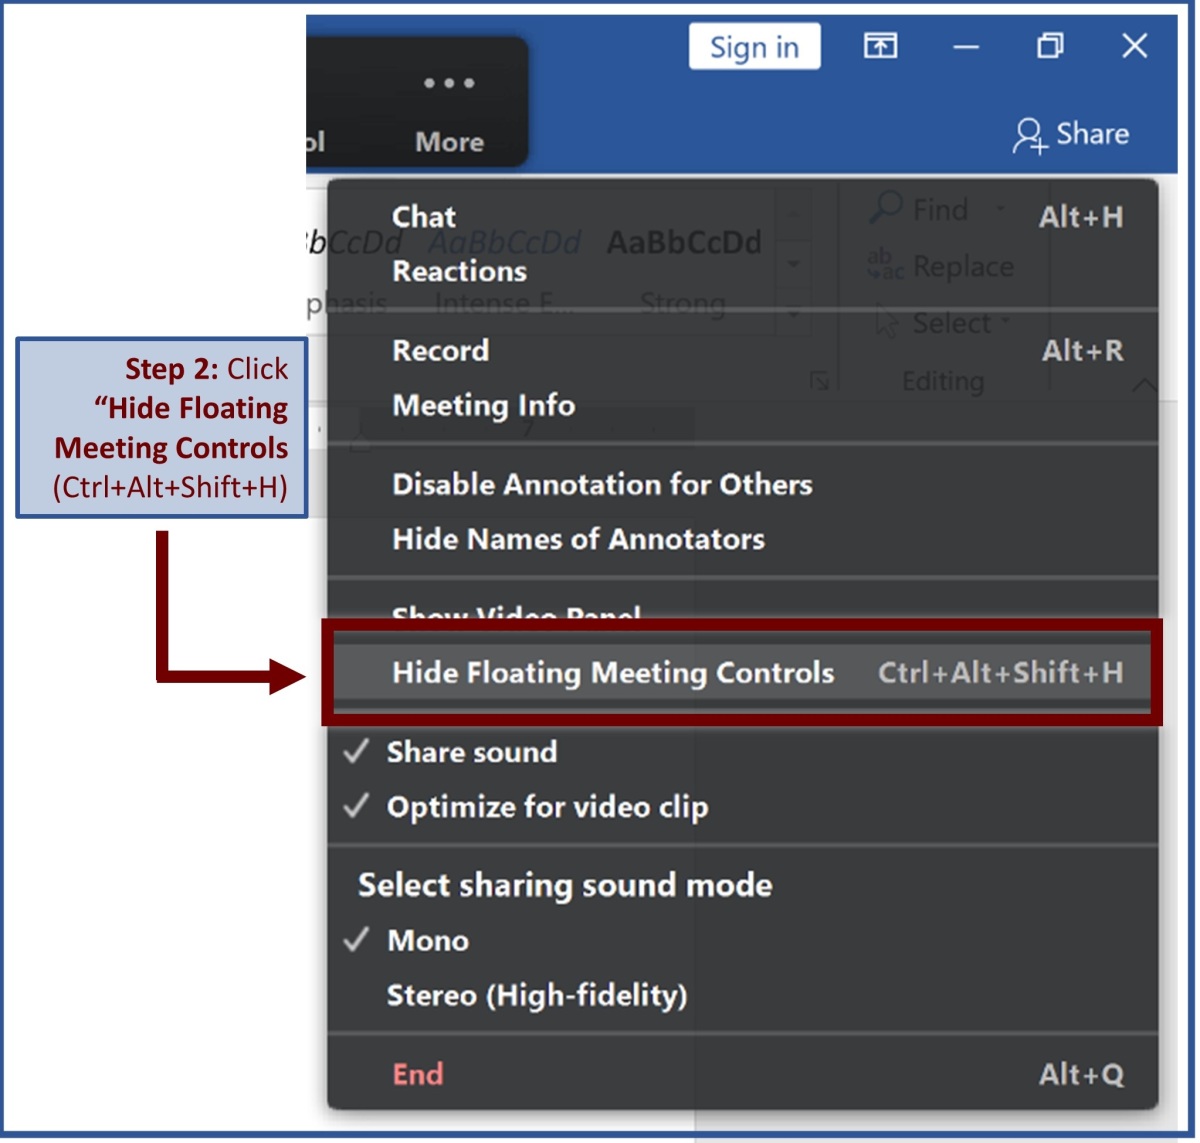
I’ll cut to the chase. The messages are “meeting controls” and here’s how to turn them OFF during your Zoom sessions and make the grey boxes stop Zoom bombing your meetings:
(click to zoom in…no pun intended)